RSS Feed

Tag Archives: Wendy Vecchi

A Friendly Reminder

Posted on

It seems when my grandkids come for a visit, I’m always reminding them to brush their teeth.  I came across a cute clipart walrus and an idea formulated to create an art piece for them.

I started by scraping some gesso on an 8″ x 10″ canvas.  I used Distress Paints (Squeezed Lemonade, Scattered Straw & Mowed Lawn) to create a “drippy” background.

tooth1 8-18-2014 3-58-39 PM

After the paint dried, I mixed some Studio 490 embossing paste with Wendy Vecchi (dandelion & carnation) Archival Ink re-inkers and stenciled a background.

tooth2 8-18-2014 6-27-37 PM

I did some stamping over the embossing paste (forgot to take a picture) and my canvas was ready for the elements.  In addition to the walrus (with Liquid Pearls – White Opal tusks) , I used a clipart toothbrush and toothpaste tube.  I used Distress Paints to color some Grungeboard shapes and letters, then used Distress Glitter and Glossy Accents to punch them up.  I created words on my computer, cut them apart and edged with Black Soot Distress Ink.  Foam tape popped some of the elements up and the rest are glued to the canvas with Glossy Accents.

I just love how it turned out and can’t wait for Tristan and Hailey to see it.

tooth3 8-19-2014 4-20-09 PMI’m entering this canvas in the Anything Goes challenge at Simon Says Stamp Monday Challenge Blog and Everything Goes at Inspiration Emporium’s Inspiration Journal August Challenge.

Thanks for having a look and as always, I love your comments!

Vic

Challenge #4 – Stencils & Texture Paste

Posted on

Challenge 4,  Layering Stencil – Texture Paste, which is on page 49 of A Compendium of Curiosities, Vol. #3.  Linda and the Curiosity Crew have created some stunning examples of this technique.  The submissions are great, as well.  Head over to StudioL3 and check them out.

This challenge is sponsored by The Funkie Junkie Boutique, a fantastic online shop that caters to fans of Tim Holtz

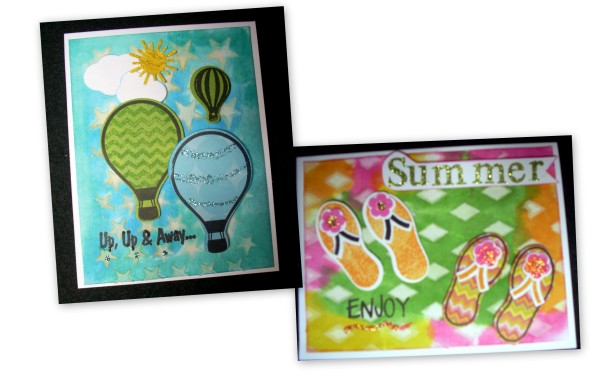
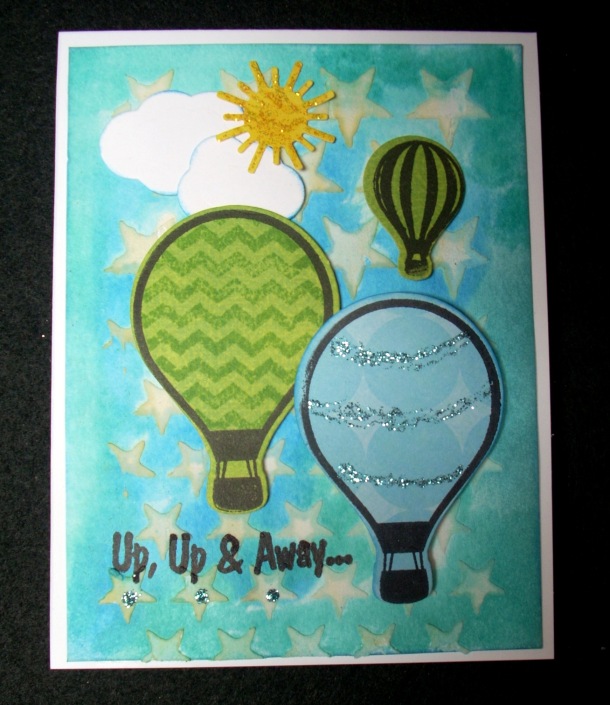
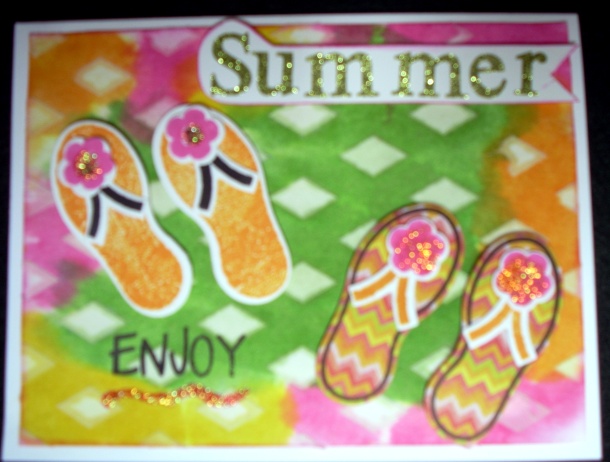
I made a couple of cards for my grandkids to celebrate the end of the school year and the beginning of summer.4 - collage 6-18-2014 8-03-06 PM


Here’s the close-ups:

4 - T card 6-18-2014 2-05-59 PM

4 - H card 6-18-2014 2-05-06 PM

I love the texture from the paste with the stencils.  I’ll put some ice cream money in each card and they have some new books, too.  Thanks for stopping by and, as always, I love your comments.

Vic


Tea (Rose) Time

Posted on

Actually, it’s Faux Tea Rose time.  The Compendium of Curiosities 3, Challenge 3 is creating faux tea roses using the technique on page 65 of Tim Holtz’s Compendium of Curiosities-3.  I had never tried making these roses before but with a little practice (it’s only paper, after all!), I am very happy with how mine turned out.

I started with a burlap panel.  I brushed on some Snow Cap paint.  When that was dry I added a brick wall with a stencil and embossing paste colored with Fired Brick re-inker.  Although most of it is covered up, you can see a bit of it peeking through.

3-3 5-30-2014 2-58-31 PM

I had a “goddess” cut out of a pop can setting on my table, I painted it with some Spun Sugar Distress Paint, sanded and rubbed it with Hydrangea Archival Ink.  I dyed some letter tiles with Peeled Paint Distress Stain.  After I laid everything out, I started attaching things to the panel weaving a ribbon through.  Some things were popped up with with double and single layers of foam tape.

I did paint the petals of my finished roses with various colors of  Liquid Pearls.  I love the look it created.  Here are some close ups:

DSCN2546

DSCN2545

Inspiration Emporium is the sponsor for Challenge #3.  Head over to Studio L3 and check out all the great ideas for faux tea roses.

Thanks for stopping by.  I’d love to know what you think of my roses.

Vic

Distressed Stencilling

Posted on

This month’s challenge at the Inspiration Journal is Marvelous Masks and Spectacular Stencils.  I recently created this piece using mostly Distress & Studio 490 products.

EWV #7

I started with a piece of mat board, I rounded the corners and cut a diamond mask with Eclipse Tape and dies.  I colored the center with Mustard Seed Distress ink and the outer section with Shaded Lilac.  I used Ranger Emboss It Dabber stamped through Studio 490 Diamonds are a Girl’s Best Friend stencil and then sprinkled on Broken China Distress Embossing Powder.  After heating, cooling and rubbing off the release crystals, I stamped the flowers from Art Rules to frame the diamond with Deep Purple Archival Ink.

I stamped the lady and sentiment from A Flair for Art with black Archival Ink.  I colored the image with Distress Markers, cut them out and used dimensional tape to adhere them to the background.  I embellished with some items from my stash.  I’ve since added a ribbon with my Tiny Attacher and hung the piece in my little art gallery corner.

Thanks for stopping by.  I hope the week ahead is a good one for all of us!

Vic

Postcards – Sent & Received

Posted on

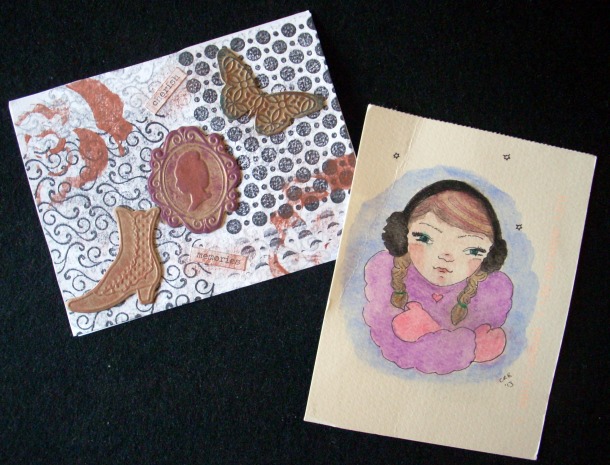
I’ve been participating in an international postcard swap sponsored by the very creative Hanna.  We send ten postcards and receive ten.  I’ve had nine arrive in my mailbox.  Each one is a unique little work of art.

rec'd 2

rec'd 1

rec'd 3

rec'd 4

I had fun creating backgrounds, stamping  and adding various embellishments.  I hope mine have arrived at their destinations, I’ve only had four confirmed.

image0

image2

image3

image5

image6

image9

image11

image12

image13

image15

I hope you enjoy seeing the big impact of little works of art.  Thanks for stopping by.  As always, I appreciate and love reading your comments.

Vic

Chunky Art ala Studio 490!

Posted on

Over at the Everything Wendy Vecchi Yahoo Group we’re having a Chunky ATC swap.The recipient of mine is my friend, Eileen.  Eileen creates fabulous art (check it out here) so I was a little nervous but with Wendy’s great stamps, Art Parts & Clearly for Art, I forged ahead!  First thing I had to do was get my hands on some 2.5 inch pieces of a 2 x 4 – you’d think being in the wood product-rich Pacific Northwest that would be easy, but it took three lumber stores before I found one to help me out!

So after a bit of sanding and a coat of gesso, I got out the Paint Dabbers, Distress & Archival Inks to use with my Studio 490 supplies.  Here’s the result.

It’s all packaged up and ready for its journey to Eileen’s home in the Bronx, NY.  I hope she’ll enjoy it as much as I enjoyed making it for her.  Let me know what you think.

We’re off to the local fair this evening to see/hear the Oak Ridge Boys!  I’m looking forward to it.
Vic

Compendium of Curiosities 2, Challenge 10!

Posted on

Wow, it’s challenge #10 over at StudioL3.  Be sure and check out all the great art created for this week.  The details are:

Technique 10: Tissue Wrap Flowers

Tim Holtz: A Compendium of Curiosities, Vol. 2, page 37

Sponsored by The Funkie Junkie’s Boutique
Last week when I was looking through old family pictures, I found my parents’ wedding picture.  They were married at my grandparents’ house in Seattle on December 9, 1950.  I was able to find a copy of their marriage certificate online and so armed with that and the picture scanned into the computer, my project began!  I created this 8″ x 10″ canvas:
Here’s a couple of close-ups:
Thank you for stopping by.  I hope you’ll leave a comment and let me know what you think of my canvas.  The theme over at Simon Says Stamp & Show is Show a Bit of Brown, so I’ll be entering it there, as well.  I’ll also submit this to the Tuesday Treasures hop here.
Vic

Shattered!

Posted on

The challenge this week at StudioL3 is Shattered Stains found on page 48 of Compendium of Curiosities Vol. 2.  We learned this technique in the Creative Chemistry 101 class, too.  Simon Says Stamp is sponsoring this week’s challenge.

I made a 9″ x 5″ mat board piece.  I used Distress Stains for the background, stamped with Archival Ink and used stamps from Studio 490 (Wendy Vecchi) and Ranger (Claudine Hellmuth).

I used some of Tim’s Movers & Shapers to cut my grungeboard shapes.  Here’s a close-up of the shattered stains:


I’m entering my piece in the following additional challenges: Everything Wendy Yahoo Group MAC #42,   Simon Says Stamp and Show … Anything Goes! and Inspiration Journal Bring on the May Flowers.

Thanks for visiting and leaving a comment – I just love them!

Vic

Faded Layers & Cracked Glass

Posted on

Challenge #4 for Compendium of Curiosities Vol. 2 is a fun one, we used the Faded Layers technique on page 43.  Be sure and head over to Studio L3 and check out all the fabulous entries.  This week I made a tag:

In addition to Distress Inks, I used paint dabbers, Perfect Pearls Mist, Stickles and Movers & Shapers Dies.

Over on the Everything Wendy Vecchi Yahoo Group we had a challenge to use a cracked glass technique.  I used one Wendy shared on her blog, Studio 490.  I love how my bottle turned out!

I started with a sea salt bottle.  A bit of paint, some Sticky Back Canvas, ink and stains and I have a cute little “vase of flowers” for my art spot.

Thanks for taking the time to stop by.  I love your kind comments.

Vic